.

.
I have come across the most lovely tutorial for these Watercolour Flowers,
by Liz from Love Grows Wild blog.
Such a simple idea,
that anyone who just wanted to be creative,
could easily create their own masterpiece.
.

.
I can also imagine tables laden with old milk bottles
filled with these flowers
at a Rustic Wedding.
.
So as usual, I wanted to try to make my very own.
I really enjoyed it, as compared to so many other tutorials on the Interweb, this tutorial was FAST!
Woo hoo!
So,
follow my simple instructions and make your own lovely version.
And enjoy the process, as when I made mine
– it was a lovely way to spend a Sunday afternoon.
———————————
You will need:

.
Step One – Tear the paper into rough petal shapes

.
Step Two – Adhere the petals onto a waterproof surface area

.
Step Three – Ensure that only a little piece at the base of each petal is covered in tape

.
Step Four – Water down the paint really well

.
Part Five – I applied a dollop of yellow paint down the centre of each petal

.
Part Six – Cover the whole petal with watered down pink paint

.
Part Seven – Remove tape from petals and set aside to dry a little (not completely)

.
Part Eight – Cut wire to roughly 30cm (12″) lengths

.
Part Nine – Using small pliers, twist and turn one end of wire to make a stamen – no perfection needed, rough is good

.
Step Ten – Group all your petals into fives, ensuring that the petals in each group are roughly the same size as each other
.
Step Eleven – Towards the base of each petal, use the wire to pierce the petals and thread each petal on to the wire – make sure you thread them UPSIDE DOWN so that they will sit right side up when you are finished


.
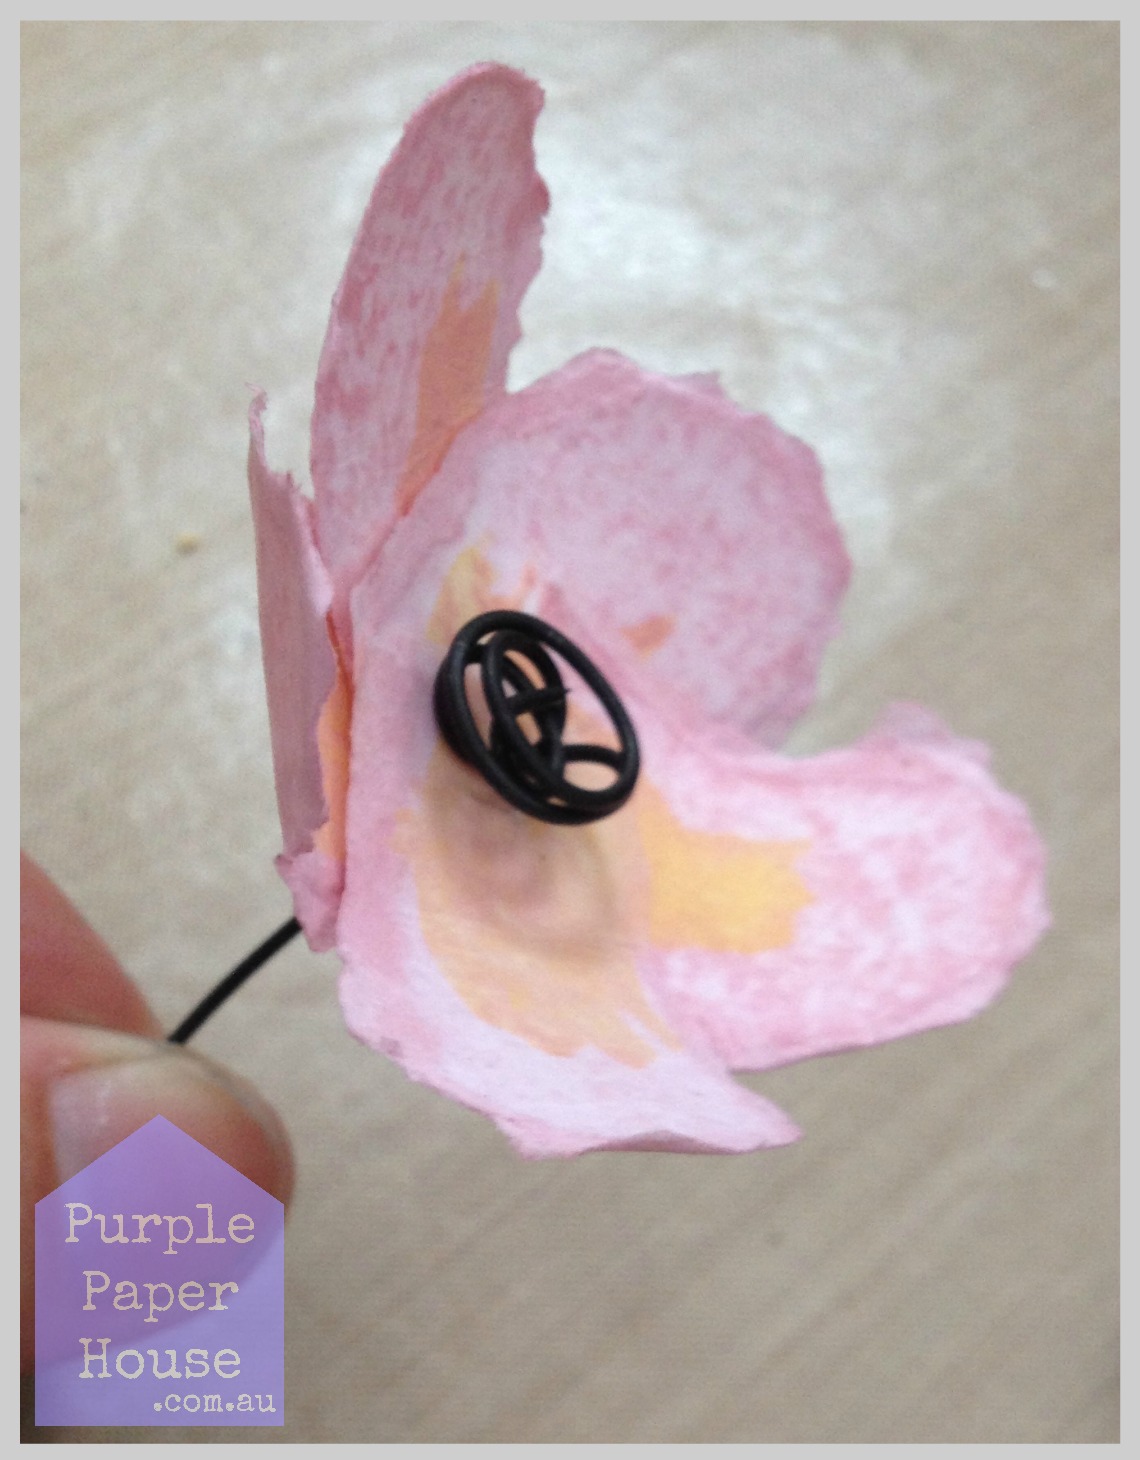
Step Twelve – Arrange petals into a shape of your flower, applying a little dab of glue between each petal

.
Step Thirteen – Add a generous dab of glue at the back where the flower meets the wire

.
Step Fourteen – Allow all glue to dry thoroughly
.
Step Fifteen – Curve petals of the flower
Ta da!
.
So are you inspired?
I’d love to see your creations.
.
.

.
If you make some flowers yourself, I’d love to see them.
Upload a photo in the comments section.
.
.
.
.
.


 Posted by amelied
