January 26, 2014
.
Stacey Dunning from Block Head Stampers,
wrote this amazingly helpful post
comparing various specialist** stamp pads.
Originally,
I came across it on the Jellybeans FB page
I then created a printable Table
so as to keep handy when I ordered any stamp pads
OR
when I did a particular project
that required a special ink.
I’ve already found it so helpful.
Onya,
Stacey
** not relevant
for general craft use
.

.
.
.
.
.
.
 Leave a Comment » |
  Craft, Papercrafts | Tagged: Blog Surfing, Cardmaking, DIY, Dry Embossing, Freebies, Mixed Media, Off The Page, Stamping, Stamping On Fabric |
  Permalink
 Posted by amelied
July 29, 2013
As I already had the clay laying around
– ’cause I needed an excuse –
I decided to make a just few more
stamped polymer clay images.

.
.
I even used some un-stamped ‘scraps’ to finish of a drop pendant design.

.
.
You like ?
So tell me . . . have you made anything like this.
I’d love you to share.
Put a link in the comments
so that we can all see your imagination at work.
.
.
.
Leave a Comment » | Craft | Tagged: Children's Craft, DIY, Green Tara, Ideas/Inspiration, Jewellery, Mixed Media, Polymer Clay, Stamping, T!M Holtz, Using Scraps | Permalink
Posted by amelied
July 27, 2013
.

Polymer clay keyrings
This is such a cute and simple idea from Ashley at the blog “Make It-Love It”.
She has simple & terrific ideas and I have ‘pinned‘ a LOT of her tutorials.
Here is my attempt at this great little craft idea.
.
1. I usually use Sculpey, as it is a great quality product and yet is probably the most affordable.

.
.
2. Break off a piece of polymer clay and then ‘work’ it. The warmer you get it, the more pliable it becomes.

.
.
3. Flatten polymer clay between two equal-height sticks.

.
.
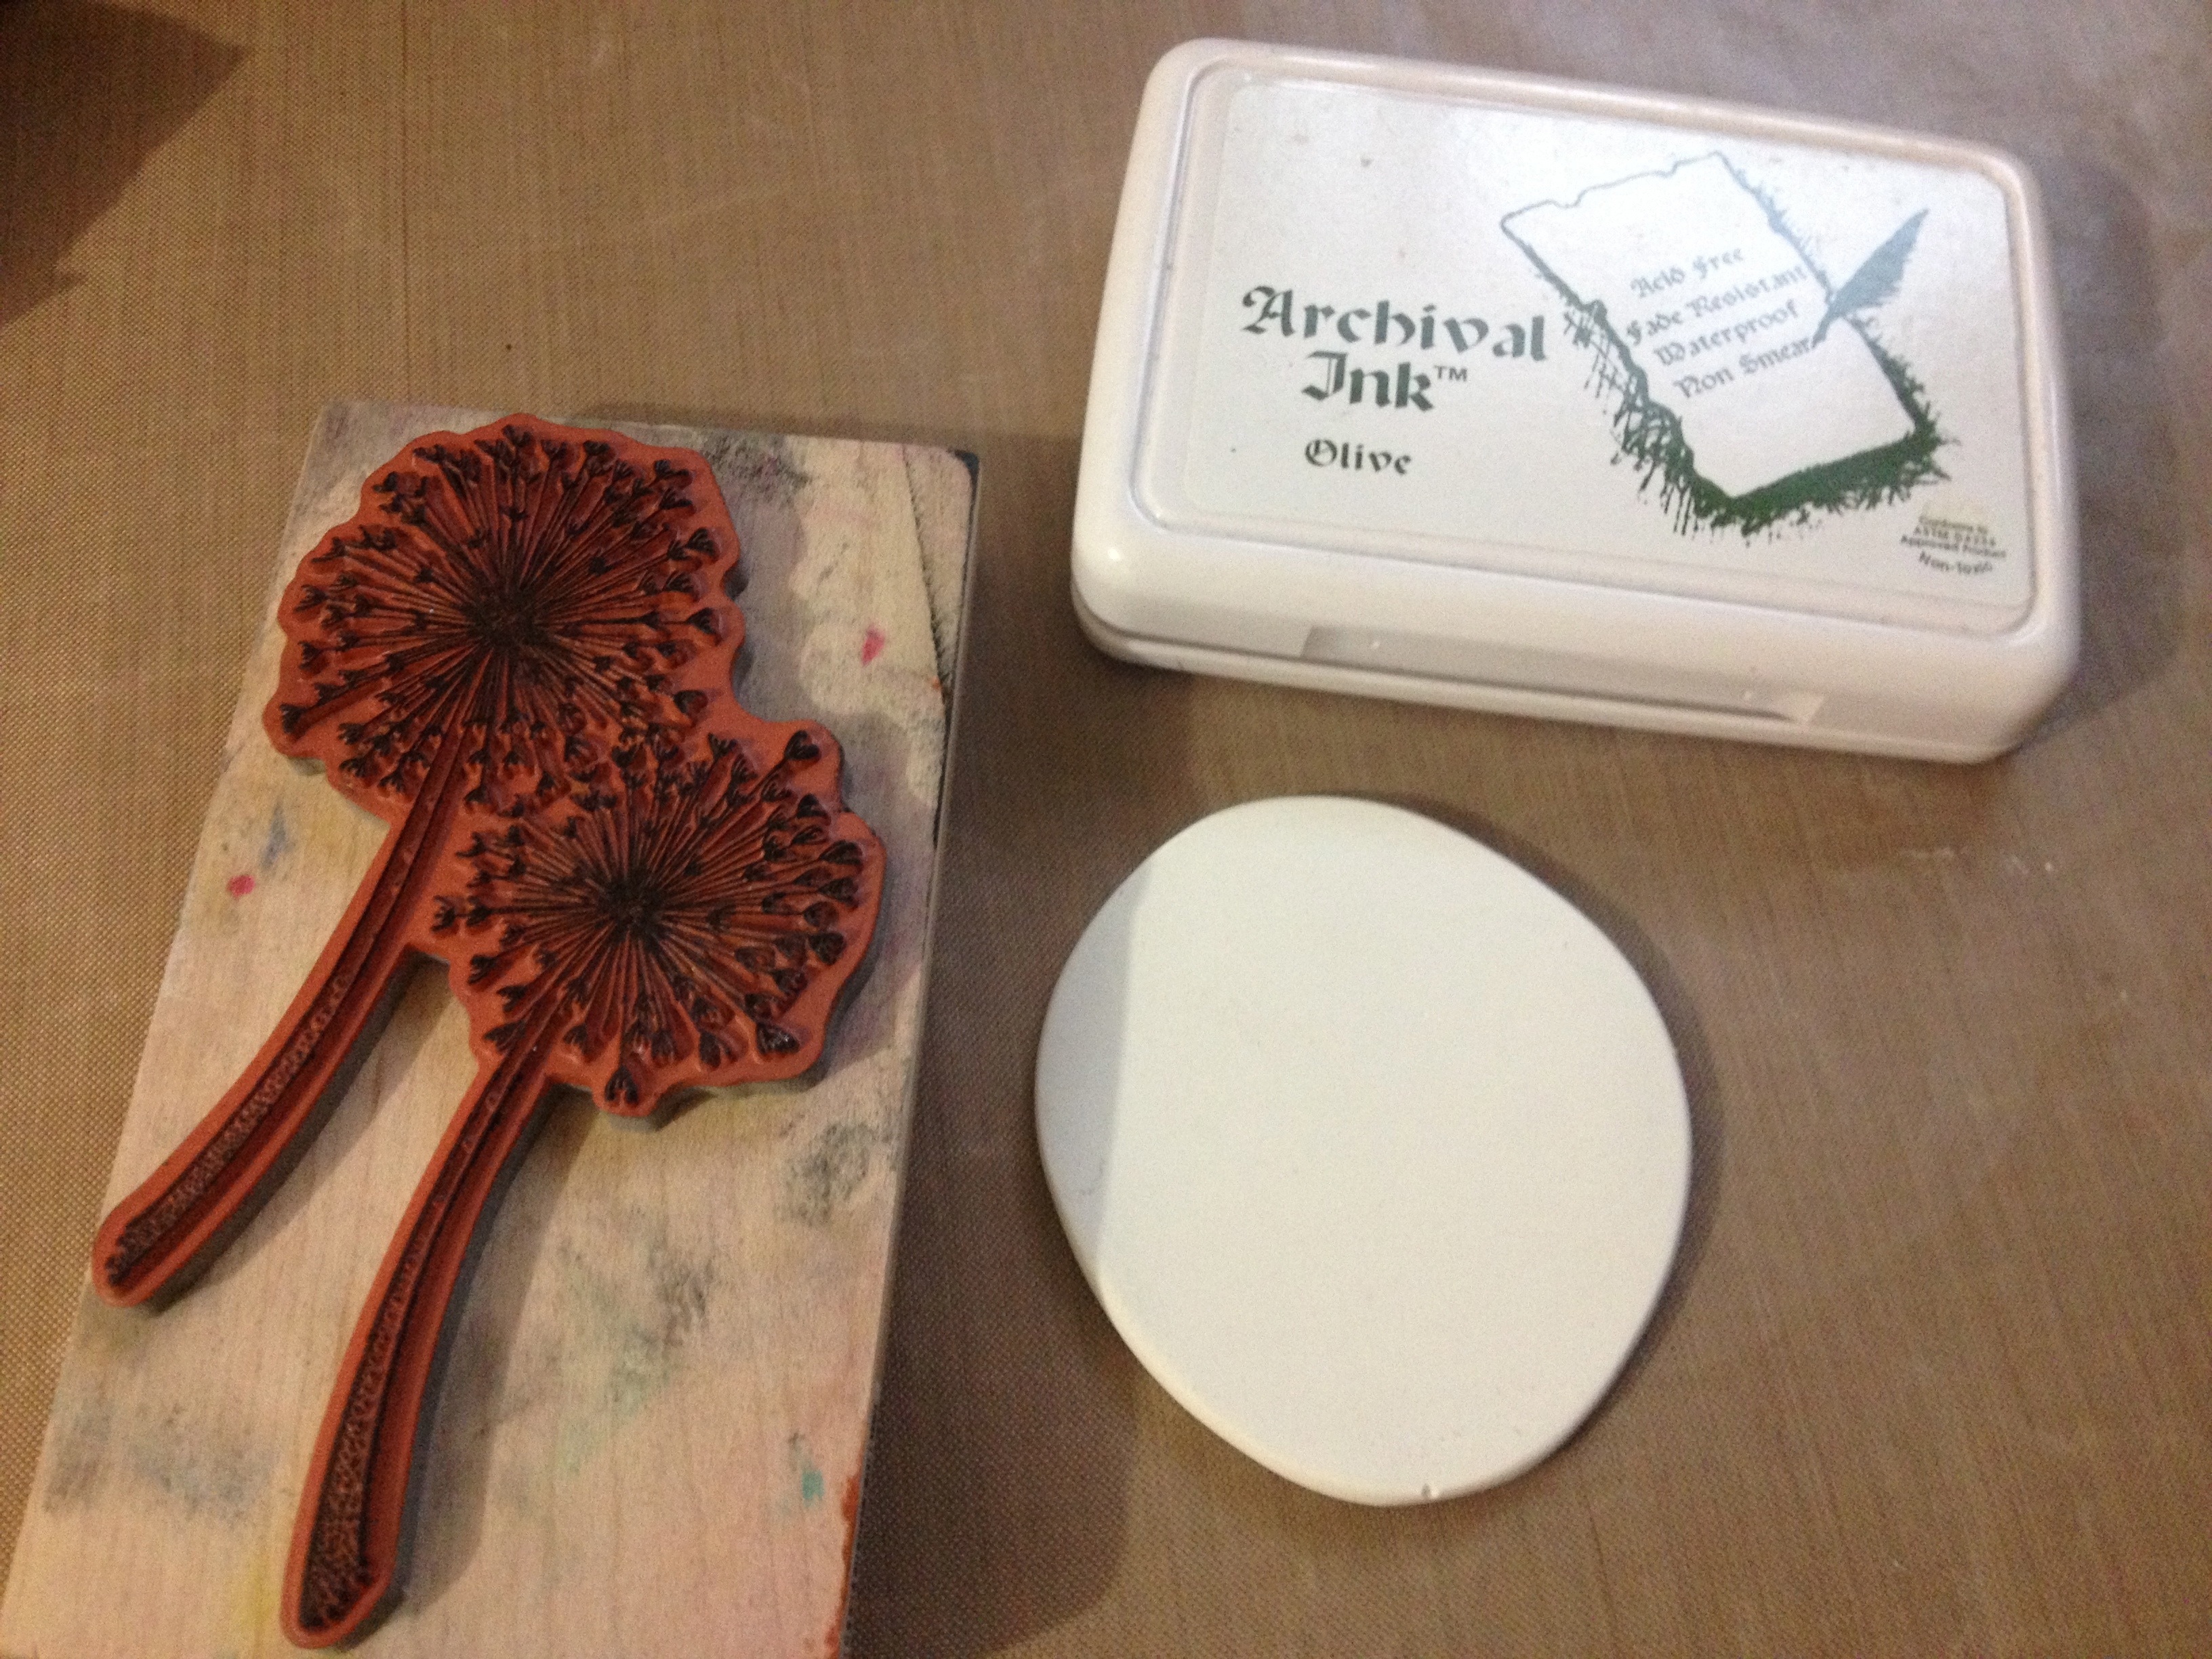
4. Using a waterproof ink pad, ink up a stamp.
Choose a stamp image that offers a strong silhouette.

.
.
5. Gently pull the polymer clay away from the stamp

.
.
6. Try stopping at one – impossible !!

.
.
I’d love to see if you make one.
Add a link in the comments, or send me a photo :)
.
.
.
Leave a Comment » | Craft | Tagged: Blog Surfing, Children's Craft, DIY, Ideas/Inspiration, Mixed Media, Polymer Clay, Stamping | Permalink
Posted by amelied
December 21, 2012
I am teaching this class on
Monday, 24th December
and
Thursday, 10th January.
I have taught it twice before and have sold one of my canvases as well.
I find it such a beautiful, graceful and calming experience.
Painting the background is so therapeutic, and
making all the flowers is an explosion of colour.
Man.
I love what I do!

Fleur Amour Canvas
2 Comments | Classes, Craft, My Artwork | Tagged: Buttons, Children's Craft, Chipboard, Collage, Collections Elements, Decor, Die Cuts, DIY, Dry Embossing, Fussy Cutting, Green Tara, Hearts, Home Decor, Ideas/Inspiration, Kaisercraft, Mixed Media, Off The Page, Paint Techniques, Paper Flowers, Ribbon, Stamping, Twiddleybitz, Using Scraps | Permalink
Posted by amelied
November 20, 2012
Well it would seem that I have been incredible lazy and unproductive. Not True!!!
I have suffered the ultimate bloggers nightmare – no computer. My new iMac blew it’s LCD screen and the company that I purchased it through was very unhelpful (“Not happy Jan”). Apple themselves were unimpressed that my new iMac was stuffed but that unfortunately has not speeded up the process of getting it fixed.
It’s so depressing not being able to ‘do’ my normal online stuff.
I have been using my old iMac (7 y.o.) and believe when I say, it’s not coping too well. The internet drops out all the time. I can’t load photos. I quite often can’t access online sites like FB or JBS. Boo Hoo.
So I am being super optimistic and trying to upload a post today.
Wish me luck peeps!!!
……………………………………………………………………………….
Leave a Comment » | Craft, My Artwork, Papercrafts | Tagged: Cardmaking, Children's Craft, Christmas, Christmas Decoration, Ideas/Inspiration, Stamping, T!M Holtz, Templates | Permalink
Posted by amelied
July 26, 2012
Here at the Purple Paper House, we’re always looking for ways to avoid the boring and unnecessary parts of life;
– bookwork
– vacuuming
– dusting
– tidying
Which is why this week, when I saw this totally wicked tutorial via Jellybean Scrappers, I joust had to have a go.
I enjoyed it SO much, I have now made four of them. I wonder how many I will make by the end of the week.

Four Spools

Cute aren’t they?
And here’s how I did it . . .
Stamp an image onto plain paper ready to adhere it to a roll of any description (I used the internal roll from my cash register docket) . . .

Stamp, then glue

Continue adhering paper

Apply glue to end of roll

Sand off the overhang

Neat edges – beautiful

Circles glued together

Apply glue to ends

Attach circles to the ends
And you’re done!
2 Comments | Craft, My Artwork, Papercrafts | Tagged: Blog Surfing, Children's Craft, Chipboard, Ideas/Inspiration, Mixed Media, Off The Page, Sewing, Stamping, Using Scraps | Permalink
Posted by amelied
July 2, 2012
Hi Peeps
I just wanted to put up some photos of the classes I am running in the holidays.
The following pictures
are examples of the techniques we will use
in the Cardmaking Class.
Remember – each pupil chooses their own colours, stamps and theme for their work.

Blend & Flick Techniques

Blend & Stamp Techniques.jpg

Wrinkle Distress Technique.jpg
3 Comments | Classes, My Artwork | Tagged: Blending Tool, Cardmaking, Children's Craft, Distress Inks, Ideas/Inspiration, Stamping, T!M Holtz | Permalink
Posted by amelied
May 24, 2012
Well it’s been an age since I have posted about our Thursday classes
here at the Purple Paper House.
Just a quickie today
(I wish, jelly fish)
I was desperate to make a card using vellum.
I think it’s a gorgeous material, but it is scary to use sometimes.
- It melts if you heat it for too long
- It can split if you try to dry emboss it
- It’s non-porous
However . . .
. . . when you finally just ‘try’ playing with it – the results can be astonishing and truly beautiful.
Joy & I mucked around a bit at first,
but this helped us build our confidence.
Here is Joy’s gorgeous final results

Joy
Here’s our process (we started with the PINK card and honed our skills on the PURPLE card)
- Stamp a simple image onto vellum (flower – white ink onto white vellum)
- Add desired coloured (we used Snow White) embossing powder and heat set (we pre-heat out tool and then moved it around the page, checking for ‘hot spots’ regularly)
- Fussy cut images (we cut five)
- Score and cut base card (white pearlescent)
- Measure and cut contrasting patterned paper (KC Tigerlilly: Blossom) and ink edges (we used white stamp pad and T!m’s blending tool for soft effect)
- Stamp and heat emboss a sentiment on a piece of vellum (a.a.)
- Attach sentiment onto card (we used Balune tape as it is the clearest under vellum)
- Attach flowers in a cluster on the card (we used a wet craft glue, as this make the vellum ‘tighten’ and therefore contort a little)
- Voila!
Here’s my attempts. . . . I think I like Joy’s better. Well – I definitely like her photos better. Ha!

Pia
For our second card (the purple and red), we followed the same steps with the following alterations . .
- We used red embossing powder and purple vellum
- Our base card was red
- Our contrasting paper was Fancy Pants Oct 31 – Bewitched
- Instead of using the blending tool, we used a purple ink pad directly onto the paper
- We attached the sentiment to the contrasting paper with Balune tape AND two pewter split pins
- When finishing the flowers, we added some ‘slick’ purple kindy glitz to the centre of each flower (in random amounts)
I really hope you can take some inspiration from our cards.
We really enjoyed making them.
Joy has already tagged the purple card for one of her DIL’s birthdays in a few weeks.
Leave a Comment » | Craft, Papercrafts | Tagged: Cardmaking, Fancy Pants, Fussy Cutting, Kaisercraft, Stamping, Using Scraps, Vellum | Permalink
Posted by amelied
March 23, 2012
Try as I might, I still not seem to organise my creative space and this therefore means the shop. And I mention it because I have just created a card that I am quite proud of and I had to do the amongst “The Mess”.
Thankfully, I was inspired by Chris at JBS with her creation.
I will post instructions HERE, shortly.
Here is my attempt.

These cards are so cool because they stand so well on a mantle or shelf!

I love the colour combination of teal/turquoise and brown
My favourite part? I have a couple . . .
- All the detail on the Collections Elements chipboard butterfly

Chipboard – painted, dry embossed, swiped with pearl-ex, edges dabbed with pinecone ink pad and then heat embossed with clear embossing powder. Final tough was a hatpin & purple thread!
- The Green Tara flower cluster

Green Tara flowers – eggplant & cream Apple Blossoms, white Stemmed Flowers (cut off into individual blooms), dark brown 10cm Gerbera that was folded and then cut in half
And here is my disgusting and absolutely inappropriate creative space. See
. . . now you know what I meant!

Pretty bad, huh!?!
NB
The gorgeous teal-coloured swirls are a T!m die that the lovely Noriel gifted me. She cut some T!m swirls for me, out of a Special K box. I then painted them in teal acrylic paint and doodled over them with a white gel pen :)
3 Comments | Papercrafts | Tagged: Cardmaking, Chipboard, Collections Elements, Die Cuts, Dry Embossing, Embellishments, Gel Pen, Green Tara, JellyBean Scrapping, Paper Flowers, Stamping, T!M Holtz, Templates | Permalink
Posted by amelied
February 28, 2012
I am an undeniable addict – and there’s nothing wrong with that.
‘Chipboard’ is the word!
I said I would post some of MY techniques today,
but my camera is still on the fritz :(
However, if someone, anyone
challenges me on this blog (in the Comments section)
for me to try a specific technique – then I will accept that challenge
and I will upload my magical creation to this blog
& then mail the original (+ some) to the winner of the dare challenge.
Do you dare?

Leave a Comment » | Craft, My Artwork | Tagged: Cardmaking, Children's Craft, Chipboard, Dry Embossing, Home Decor, I Dare You!, Ideas/Inspiration, Off The Page, Paint Techniques, Scrapbooking, Stamping, Using Scraps | Permalink
Posted by amelied